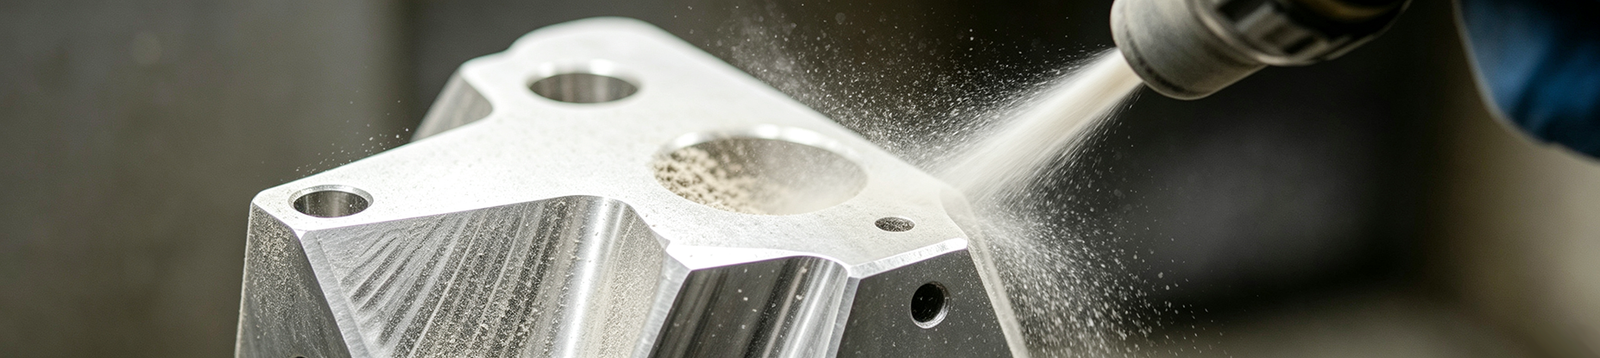
Bead blasting is a standard matte/satin finish for CNC machined metal parts. It hides tool marks, uniformizes texture, and prepares surfaces for coating — all without measurably changing part dimensions. But the process is more nuanced than “point and shoot.” Media choice, pressure, and moisture mode determine whether you get a uniform satin finish or a cloudy, inconsistent surface that rejects anodizing.
This guide covers the process parameters that actually matter, the Ra ranges you can expect, how to specify bead blasting on a drawing, and how it compares to anodizing, powder coating, and electropolishing — so you can make the selection call before the part hits the blast cabinet.
Ⅰ. What Is Bead Blasting?
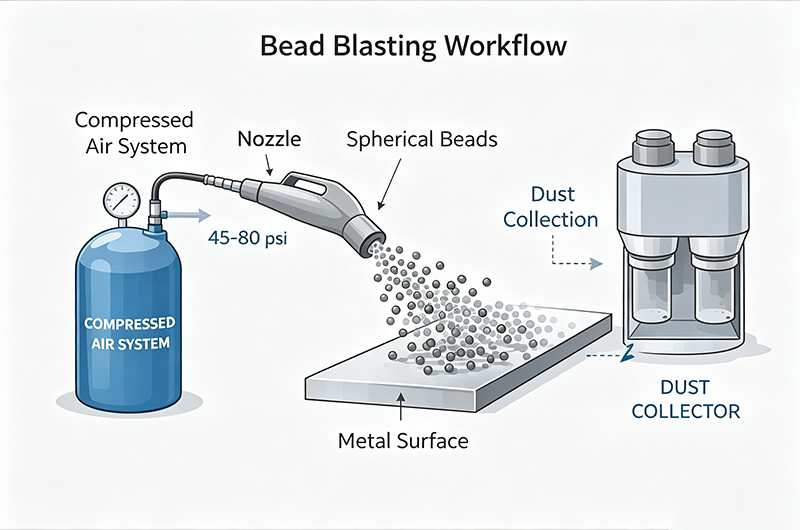
Bead blasting is a surface finishing process that propels spherical abrasive media — most commonly glass beads — at a part surface using compressed air. The round beads strike the surface and create thousands of microscopic dimples. These overlapping dimples scatter light uniformly, producing the characteristic matte or satin appearance. Because the media is spherical rather than angular, it peens the surface rather than cutting into it — material is not removed in any meaningful quantity.
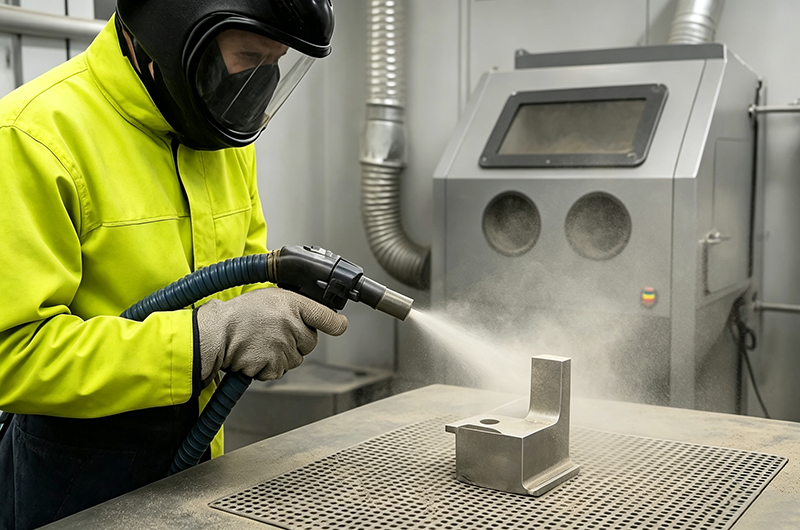
The process runs inside a sealed blast cabinet. The operator (or a robotic arm) directs the media stream at the part through a nozzle, while a dust collection system captures debris and spent media. Bead blasting is almost always a post-machining step: the part comes off the CNC with tool marks, gets blasted to a uniform texture, and then optionally moves to anodizing, powder coating, or electropolishing.
Key distinction from sandblasting: sandblasting uses angular particles (silica, aluminum oxide) that cut and etch the surface, removing material and leaving a rougher, darker finish. Bead blasting uses spherical media that deform the surface through peening, preserving dimensions and producing a brighter, smoother result.
Bead Blasting Process and Key Parameters
The overall workflow is straightforward: load the part into the cabinet → select media → set pressure, distance, and angle → blast → inspect. The equipment consists of a blast cabinet, an air compressor, a nozzle (handheld or fixed), a media hopper, and a dust collector. What determines the result is not the equipment but the parameter combinations.
Common Blast Media Types and Selection
Media choice is the single biggest determinant of surface finish. Four media types cover nearly all production bead blasting:
| Media | Mohs Hardness | Best For | Surface Effect | Reusability | Relative Cost |
|---|---|---|---|---|---|
| Glass beads | 5.5 | General-purpose finishing, aluminum, steel — the default | Uniform satin/matte, retains base color | ~30 cycles | Low |
| Ceramic beads | 7–9 | Stainless steel, titanium, high-volume production | Brighter, slightly smoother matte | 70–90 cycles | Medium |
| Plastic beads | 3–4 | Thin-walled parts, plastics, delicate surfaces | Very gentle, minimal texture change | Medium | Medium |
| Steel shot | 6–7.5 | Heavy peening, carbon steel, fatigue-life improvement | Smooth with slight gloss | Hundreds of cycles | Medium-High |
Glass beads are the workhorse. They are lead-free soda-lime glass, chemically inert, contain no free silica (no silicosis risk), and do not alter the part’s base color. For most CNC machined parts — aluminum housings, steel brackets, stainless fittings — glass beads at medium grade are the starting point. Ceramic beads justify their higher cost when you need longer media life in high-volume runs, or when blasting harder alloys like titanium and stainless where glass beads break down too quickly.
A note on media contamination: once glass beads fracture and mix sharp fragments back into the media stream, the process effectively becomes grit blasting — the surface gets scratched instead of peened. This is why media must be sifted and replaced on schedule, and why virgin media is mandatory before anodizing (covered in the combination process section).
Key Process Parameters
Four parameters control the final finish. They interact — changing one often requires adjusting the others.
| Parameter | Typical Range | Effect |
|---|---|---|
| Air pressure | 30–100 PSI (material-dependent) | Higher pressure = more aggressive peening, shorter media life. Lower pressure = gentler, better for soft metals |
| Bead size (mesh) | 40–325 mesh (fine to coarse) | Finer beads → lower Ra → smoother, more polished. Coarser beads → higher Ra → more texture |
| Nozzle distance | 4–8 in (100–200 mm) | Closer = more concentrated impact. Farther = wider, softer pattern |
| Blast angle | 60–90° | Lower angles for delicate features. 90° for uniform coverage |
Pressure varies significantly by material. Aluminum (40–60 PSI) and copper (35–55 PSI) need lower pressure because they deform easily — over-blasting aluminum produces a cloudy, over-peened surface. Stainless steel (50–70 PSI) and titanium (60–80 PSI) need higher pressure because they resist deformation. Carbon steel sits at 60–80 PSI.
The practical rule: start low and test. A trial at 30 PSI on a sample coupon costs nothing; recovering an over-blasted part costs a remake.
Dry Blasting vs. Wet Blasting (Vapor Blasting)
Standard bead blasting is dry — compressed air propels the media. Wet blasting (also called vapor blasting or slurry blasting) mixes water with the media in the stream. The water acts as a cushion and lubricant, producing a different set of results.
| Aspect | Dry Blasting | Wet Blasting (Vapor) |
|---|---|---|
| Surface texture | Standard matte/satin | Smoother, more refined, often brighter |
| Dust | High — requires dust collection | Near zero — water suppresses dust |
| Media breakdown | Faster (beads fracture on impact) | Slower (water cushions impact) |
| Media embedment | Possible on soft metals | Minimal — water washes away debris |
| Best for | General production, cost-sensitive parts | Precision parts, medical, parts with cleanliness requirements |
| Speed | Faster | Slower (lower impact energy) |
Dry blasting is the default for cost and throughput. Switch to wet blasting when the part has tight cleanliness requirements (medical, aerospace), when media embedment in soft metals is a concern, or when you need a finer, more cosmetic finish than dry blasting can deliver. Wet blasting is also preferable before anodizing on aluminum — the water flushes out fractured glass particles that would otherwise embed and cause anodizing defects.
Ⅱ. What Surface Finish Does Bead Blasting Produce?
Surface Appearance and Texture
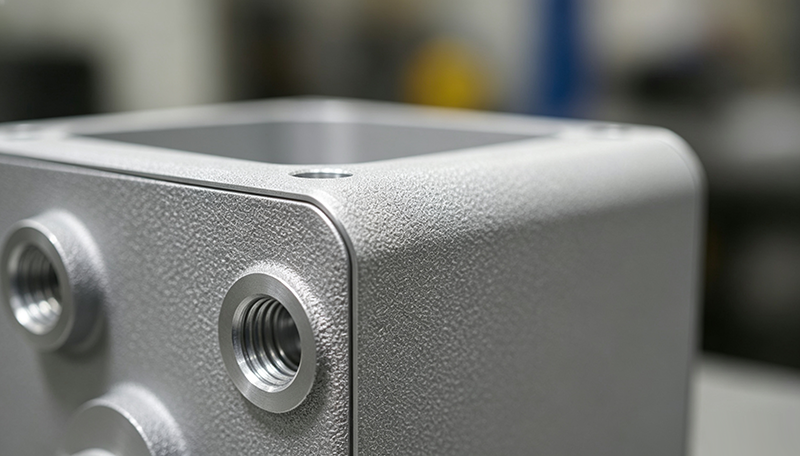
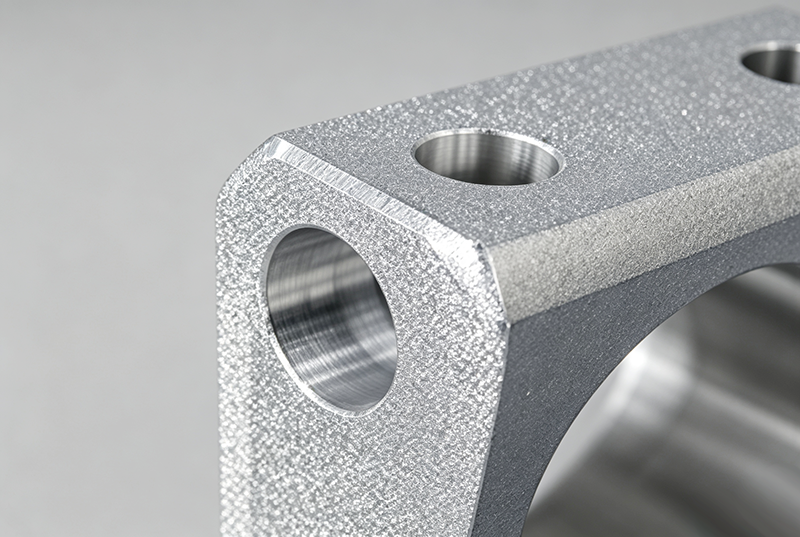
Bead blasting produces a uniform, non-directional matte or satin finish. The texture has no visible grain or pattern — unlike brushing, which leaves linear striations. This non-directional quality is why bead blasting is the standard pre-finish for consumer electronics housings, medical instruments, and any part where visible tool marks would be unacceptable.
The finish hides CNC tool marks, light scratches, and minor surface imperfections. It does not, however, remove deep gouges, heavy oxide layers, or weld discoloration — those require a more aggressive process (grit blasting or grinding) before bead blasting.
A bead-blasted surface feels smooth but slightly textured to the touch — not mirror-smooth like polishing, not rough like sandblasting. The texture also reduces glare and fingerprint visibility, which is why it is common on consumer-facing metal parts.
Surface Roughness (Ra) Range
The typical Ra range for bead blasting is 0.8–3.2 µm (32–125 µin). Within that range, the specific value depends on media type and bead size:
| Finish Category | Ra Range | Typical Media/ Mesh |
|---|---|---|
| Fine bead blast | 0.8–1.6 µm | Fine glass beads (170–325 mesh) |
| Standard bead blast | 1.6–3.2 µm | Medium glass beads (60–100 mesh) |
| Coarse bead blast | 3.2–6.3 µm | Coarse glass beads (40–60 mesh) or ceramic |
For reference, an as-machined CNC surface typically sits at 0.8–1.6 µm Ra, while sandblasted surfaces exceed 6 µm. Bead blasting therefore produces a texture in the same roughness band as a decent machined finish, but uniformized and without directional tool marks.
A practical note on Ra callouts: specifying Ra below 0.8 µm on a bead-blasted part is unrealistic — at that point, you need polishing, not blasting. Similarly, avoid demanding a tight Ra tolerance band (e.g., 1.6–1.8 µm) on bead blasting. The process has natural variation of ±0.3–0.5 µm; specify a range (e.g., 1.6–3.2 µm) or provide a boundary sample instead.
Factors Affecting Finish Consistency
Several variables cause the same part to come out differently between batches — or even across different areas of the same part:
- Inconsistent blast angle and distance. Manual blasting depends on operator technique. If the nozzle drifts closer or the angle changes, that area gets more aggressive peening. Robotic blasting solves this but adds cost.
- Media aging and contamination. As beads cycle through the cabinet, they fracture into sharp fragments. If these are not sifted out, the media stream shifts from peening to scratching, and the surface becomes rougher and more inconsistent. Media replacement schedules matter.
- Complex geometry and shadowing. Internal cavities, deep pockets, and blind holes do not receive uniform media impact. The blast stream cannot reach all surfaces at the same angle, creating “shadow” areas with lighter or no texture. These areas may need masking or a different approach entirely.
- Pressure fluctuations. Compressor output can vary during a run. A 10-PSI drop changes the peening intensity enough to produce a visible difference.
These factors are why the engineering drawing section below emphasizes boundary samples and masking callouts — consistency problems are best solved by clear specification, not by hoping the operator gets it right.
Ⅲ. Bead Blasting Effects by Material
The same media and parameters produce visibly different results depending on the substrate. Here is what to expect across the five most common CNC machined metals:
| Material | Recommended Pressure | Visual Result | Notes |
|---|---|---|---|
| Aluminum (6061, 7075) | 40–60 PSI | Fine matte, uniform | Sensitive to over-blasting — excessive pressure or dwell produces a cloudy, over-peened surface. Standard pre-finish before anodizing. |
| Stainless steel (304, 316) | 50–70 PSI | Slightly brighter matte than aluminum | Higher hardness requires more impact energy. Common for medical instruments and industrial hardware. Maintain consistent nozzle distance to avoid brightness variation. |
| Titanium (Ti-6Al-4V) | 60–80 PSI | Uniform matte gray | Needs higher pressure due to strength. Avoid media contamination — titanium is sensitive to embedded particles, critical for aerospace and medical parts. |
| Carbon steel | 60–80 PSI | Coarser matte, darker | Often used as pre-coating preparation. Clean thoroughly after blasting to prevent flash rust. |
| Brass / Copper | 35–55 PSI | Soft satin metallic | Soft, high-ductility alloys — use low pressure to avoid over-deformation and loss of fine surface detail. |
The key takeaway: aluminum and copper are forgiving of low pressure but punish high pressure. Stainless and titanium need enough energy to peen effectively but tolerate variation better. Carbon steel is the most robust but rusts immediately after blasting if not protected.
Ⅳ. Bead Blasting vs. Other Surface Finishes
Bead blasting is one option among many. The comparison below covers the five finishes most commonly weighed against it:
| Finish | Surface Result | Typical Ra | Material Removal | Relative Cost | Best When |
|---|---|---|---|---|---|
| Bead blasting | Uniform matte/satin | 0.8–3.2 µm | Negligible (~0.005–0.025 mm) | Low ($15–45/part) | You need a cosmetic matte finish that hides tool marks |
| Anodizing | Hard protective oxide layer | Depends on pre-finish | None (adds layer) | Medium | You need corrosion resistance, color, or hardness on aluminum |
| Powder coating | Thick polymer coating | N/A (covers texture) | None (adds layer) | Medium | You need durable corrosion/abrasion protection, color options |
| Electropolishing | Smooth, bright, passive surface | 0.1–0.4 µm | 0.005–0.025 mm | Medium-High | You need maximum corrosion resistance and cleanliness on stainless |
| Polishing | Mirror-like reflective surface | <0.1 µm | 0.01–0.1 mm | Medium-High | You need a decorative mirror finish |
| Brushing | Linear directional texture | 0.4–1.2 µm | Minimal | Low | You need a decorative linear grain pattern |
Bead blasting is the lowest-cost option that produces a uniform cosmetic finish. It is also the most common pre-finish for anodizing and powder coating — the matte texture it creates improves coating adhesion (supplier data cite 15–40% improvement) and produces a more uniform anodized appearance. The two are not competitors; they are sequential steps.
Where bead blasting falls short: it provides no corrosion protection (the peened surface actually has slightly reduced corrosion resistance due to increased surface area), no color, and no significant dimensional cleanup. If any of those are required, bead blasting is a prep step, not a final finish.
Ⅴ. Bead Blasting + Anodizing: The Most Common Combination
Bead blasting followed by Type II or Type III anodizing is the standard surface treatment stack for aluminum CNC parts. The combination is so common that most manufacturing platforms (including Keywin) offer it as a single selectable finish option.
Why Bead Blasting Is the Standard Anodizing Pre-Finish?
An as-machined aluminum surface has tool marks, oxidation, and inconsistent texture. If you anodize directly over this, the anodized layer follows the underlying surface — tool marks remain visible, and the anodic film grows unevenly. Bead blasting uniformizes the substrate first, so the anodized layer forms consistently and the final appearance is a clean, uniform matte color.
The peened texture also improves mechanical adhesion between the aluminum substrate and the anodic oxide layer, reducing the risk of chipping or flaking on Type III (hard) anodizing.
Process Sequence
The correct order is:
- CNC machining — part comes off with tool marks
- Bead blasting — uniformizes surface texture, removes tool marks
- Cleaning / degreasing — removes embedded media, oils, and contaminants
- Anodizing — grows oxide layer over the blasted texture
- Sealing — closes pores in the anodic layer
Skipping or misordering any step causes defects. The most common failure is skipping the cleaning step — residual glass bead fragments embed in the aluminum during blasting, and if they remain during anodizing, they create white spots and adhesion failures in the anodic layer.
Critical Notes
- Virgin media requirement. Media used before anodizing must be clean, unfractured glass beads. Reused media that has picked up contamination (oil, metal shavings from previous parts, fractured sharp fragments) will transfer those contaminants to the aluminum surface and cause anodizing defects. Many shops dedicate a separate media batch exclusively for pre-anodizing parts.
- Cleaning standard. After blasting, parts must be ultrasonically cleaned or chemically degreased before anodizing. A visual inspection is not sufficient — microscopic media residue is invisible but will ruin the anodic layer.
- Type III (hard anodizing) consideration. Hard anodizing builds a thicker oxide layer (25–50 µm) that amplifies the underlying texture. A fine bead blast (Ra 0.8–1.6 µm) before hard anodizing produces a smooth matte gray finish; a coarse blast produces a rougher, darker surface. Match the blast grade to the anodizing type.
Ⅵ. When Should You Choose Bead Blasting?
Choose bead blasting when: – You need a uniform cosmetic matte/satin finish on a CNC machined metal part – You want to hide tool marks, light scratches, or minor surface inconsistencies – You are preparing aluminum for anodizing or any metal for powder coating – The part has complex geometry where polishing or brushing cannot reach all surfaces – You need a non-directional texture (no visible grain pattern) – Budget is a factor — bead blasting is among the lowest-cost surface finishes
Do not choose bead blasting when: – You need corrosion protection or color (use anodizing, powder coating, or electropolishing) – You need a mirror finish (use polishing) – You need a specific directional texture (use brushing) – The part has tight tolerances (±0.01 mm or tighter) on surfaces that will be blasted — while material removal is minimal (~0.005–0.025 mm), it is not zero, and the peened surface is less dimensionally predictable – The part has walls thinner than 1.5 mm — media impact can cause deformation – The part has deep blind holes or internal cavities that cannot be reached uniformly — these areas will have inconsistent or no texture
Where bead blasting is wasted: specifying bead blasting on a part that will be powder coated is unnecessary unless the underlying surface has visible tool marks that would telegraph through the coating. If the machined surface is already acceptable, skip the blasting step — powder coating will cover the texture anyway.
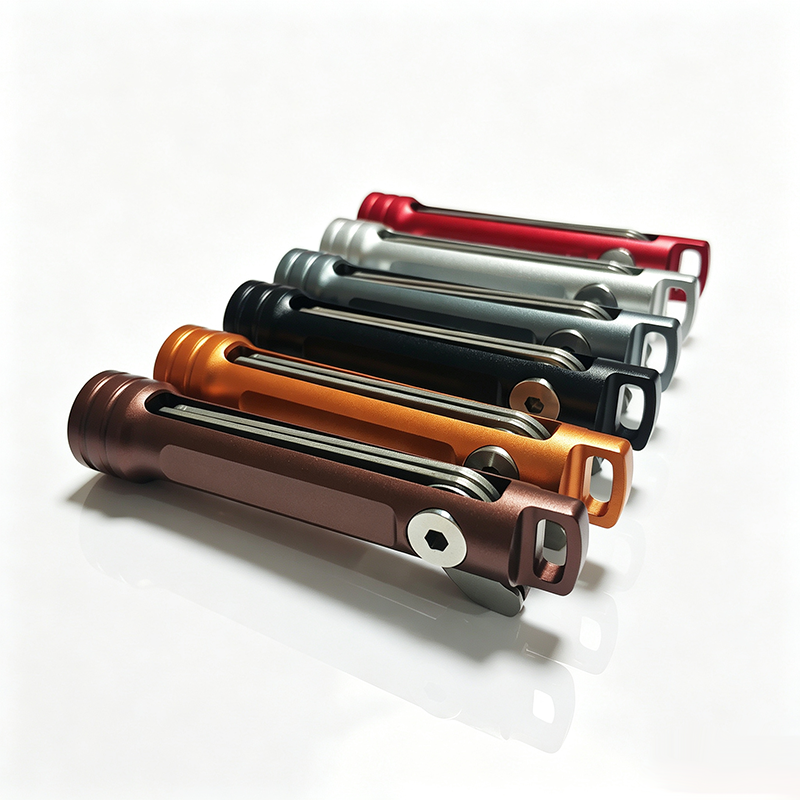
Ⅶ. How to Specify Bead Blasting on Engineering Drawings
This is where most bead blasting problems start. A drawing that says “bead blast” with no further specification leaves everything to the operator’s judgment — and the result will vary by shop, by shift, and by operator. Clear specification on the drawing is the single most effective way to get consistent results.
What to Put on the Drawing
A complete bead blasting callout should include:
- Media type and grade. Specify the media (glass beads, ceramic beads) and the grade (fine, medium, coarse, or a specific mesh number). Example: “Bead blast all surfaces using fine grade glass bead media.”
- Ra range (if critical). Specify the acceptable Ra range rather than a single value. Example: “Ra 1.6–3.2 µm.” Avoid callouts tighter than ±0.3 µm — the process cannot reliably hold them.
- Masking callouts for critical features. Identify surfaces that must NOT be blasted. Threaded holes, mating/sealing surfaces, O-ring grooves, and precision bores should be masked. Example: “Mask indicated surfaces and tapped holes prior to media blasting.”
- Boundary sample reference. If the finish is cosmetic and specific, reference a boundary sample (a physical reference part). Example: “Finish to match boundary sample BB-001.” If no physical sample exists, provide high-resolution photos from multiple angles.
- Process sequence (if part of a stack). If bead blasting is followed by anodizing or coating, state the order explicitly. Example: “Bead blast → degrease → Type II anodize, black.”
Example Callouts
Three ready-to-use templates:
- Simple: “Bead blast all surfaces using fine grade glass bead media.”
- Parameter-specified: “Media blast with #70–100 glass bead at 50–60 PSI.”
- With masking: “Mask indicated surfaces and tapped holes prior to media blasting. Media blast un-masked surfaces with medium grade glass bead. Ra 1.6–3.2 µm.”
Common Mistakes to Avoid
- Calling out Ra below 0.8 µm. Bead blasting cannot produce surfaces that smooth. If you need Ra < 0.8 µm, specify polishing.
- No masking on threaded holes. Even if the shop masks by default, put it on the drawing. Unmasked threads collect media and may need re-tapping.
- Tight Ra tolerance bands. A callout of “Ra 1.6–1.8 µm” is unrealistic. Use “Ra 1.6–3.2 µm” or provide a boundary sample.
- Forgetting to specify media type. “Bead blast” alone does not tell the shop whether to use glass, ceramic, or plastic beads — and the results differ significantly.
Ⅷ. What Affects Bead Blasting Cost?
Bead blasting is among the lowest-cost surface finishes available. Understanding the cost structure helps with budgeting and with deciding when a more expensive finish is justified.
Cost Range
Based on supplier data from the SERP landscape, typical bead blasting costs fall in these ranges:
| Cost Factor | Range |
|---|---|
| Per-part cost (standard CNC parts) | $15–45 per part |
| Hourly rate (custom/large parts) | $50–150 per hour |
| Setup cost (masking, fixturing) | $10–30 per lot |
These are standalone bead blasting costs. When combined with anodizing (the most common stack), the total typically adds $5–15 per part on top of the anodizing cost, as blasting is a quick prep step within the same workflow.
Cost Comparison Across Finishes
| Finish | Typical Per-Part Cost | Relative Cost |
|---|---|---|
| Bead blasting (standalone) | $15–45 | Baseline |
| Brushing | $10–30 | Slightly lower |
| Anodizing (Type II) | $20–60 | Similar to slightly higher |
| Powder coating | $25–75 | Higher |
| Electropolishing | $40–100 | Significantly higher |
| Polishing (mirror) | $50–150 | Highest |
What Drives Cost Up
- Part size and surface area. Larger parts take more blasting time. A small bracket takes minutes; a large enclosure panel can take an hour.
- Batch size. Single parts and small batches carry setup overhead. Production quantities amortize this cost.
- Masking complexity. Every masked feature (thread, bore, sealing surface) adds labor time. Complex masking can double the per-part cost.
- Media type. Ceramic beads cost more than glass but last longer — the media cost is offset by lower replacement frequency in high-volume runs.
- Wet blasting. Vapor blasting is slower and requires specialized equipment, adding 20–40% to cost vs. dry blasting.
- Tight finish requirements. If the drawing specifies a tight Ra band or requires a boundary sample match, the shop must slow down and inspect more frequently.
What Keeps Cost Down
- Specify a Ra range, not a single value
- Minimize masking — only mask what truly needs protection
- Use standard glass bead media unless the application demands ceramic
- Order in batches, not one-off
- Accept dry blasting when wet blasting is not required
Conclusion
Bead blasting is a low-cost, low-risk surface finish that uniformizes CNC machined parts and prepares them for anodizing or powder coating. The process is straightforward, but the results depend on media selection, pressure, and — critically — clear specification on the engineering drawing. Specify the media, give a Ra range, mask the features that matter, and provide a boundary sample if the finish is cosmetic. That is the difference between a part that looks right every time and one that varies by batch.
If you are sourcing CNC machined parts and need bead blasting — standalone or combined with anodizing — Keywin offers bead blasting as a standard surface finish on all CNC machined metals, with instant quoting and free DFM feedback. Upload your CAD file to get a quote with surface finish options included, or reach out to discuss masking requirements and process sequencing for your specific part.
FAQ
1. Does bead blasting change part dimensions?
Material removal is minimal — typically 0.005–0.025 mm. For most CNC parts with standard tolerances (±0.1 mm), this is negligible. For tight tolerances (±0.01 mm or tighter), specify masking on critical surfaces or avoid bead blasting on those features.
2. Do I need to specify bead blast areas on the drawing?
Yes. If only certain surfaces should be blasted, call them out explicitly and add masking notes for surfaces that must be protected. A drawing that says “bead blast” with no area specification will result in the entire part being blasted.
3. Should threads and mating surfaces be masked?
Yes. Threaded holes, precision bores, sealing surfaces, and O-ring grooves should always be masked. Media can embed in threads and alter mating surface geometry. Put masking callouts on the drawing even if the shop masks by default.
4. Can bead blasting remove CNC tool marks?
Yes — hiding tool marks is one of the primary purposes of bead blasting. Light to moderate tool marks are fully obscured. Deep gouges or heavy machining marks may require a more aggressive process (grit blasting or grinding) before bead blasting.
5. Will aluminum oxidize or discolor after bead blasting?
Bare bead-blasted aluminum will begin to oxidize and may develop a cloudy appearance over time. If the part is for cosmetic or corrosion-sensitive applications, bead blasting should be followed by anodizing or a clear coat. Bead blasting alone does not provide corrosion protection.
6. Can I anodize directly after bead blasting?
Yes, and it is the most common combination. But the part must be cleaned (ultrasonically or chemically degreased) between blasting and anodizing to remove embedded media residue. Use virgin glass bead media before anodizing — contaminated or fractured media causes white spots and adhesion defects in the anodic layer.
7. How much lead time does bead blasting add to a CNC order?
Bead blasting itself is fast — typically 1–3 days added to the CNC machining lead time. The variables that extend it are masking (complex masking patterns add setup time), large batch sizes, and whether it is combined with anodizing or powder coating (which adds its own processing queue). If the part needs a specific Ra or a cosmetic-critical uniform finish, request a first-article inspection before full-batch processing.