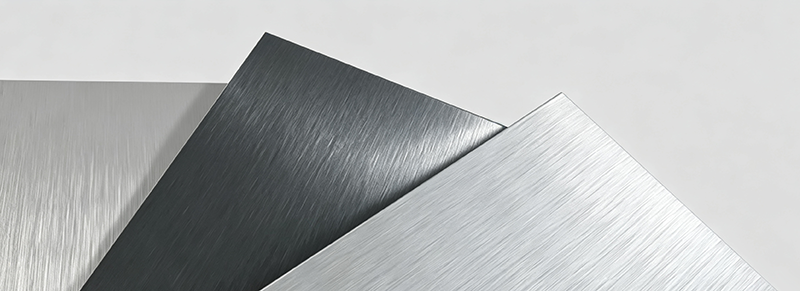
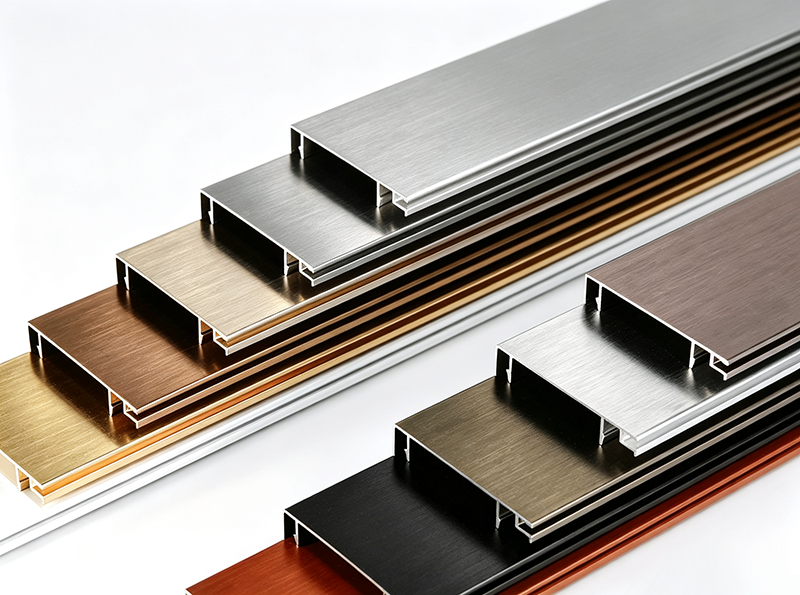
Brushed aluminum gives a part a uniform, directional grain — a low-glare metal texture that hides minor scratches and fingerprints better than a mirror polish. It is a common choice for consumer electronics housings, appliance panels, automotive interiors, medical device covers, and industrial enclosures where the part should look finished without being reflective.
The finish is not universal. Brushing cannot erase deep scratches, dents, or weld marks, it does not reach deep pockets and internal corners evenly, and the grain is directional — two parts brushed in different orientations will not match visually. The decisions that matter are practical: whether the part’s geometry supports an even grain, which alloy to call out, what grit and grain direction to specify, how much the finish adds to cost, and how to accept parts objectively instead of arguing about “good appearance.” Each is covered below.
Ⅰ. What Is Brushed Aluminum?
Brushed aluminum is aluminum whose surface has been ground with an abrasive in one controlled direction, producing fine parallel lines — the grain. The process changes surface texture, gloss, and visual character; it does not change dimensions in any meaningful way, since material removal at brushing depths is negligible for tolerance. Because the surface already consists of fine, uniform lines, it reads as satin or matte rather than mirror, and small scratches and fingerprints blend in instead of standing out.
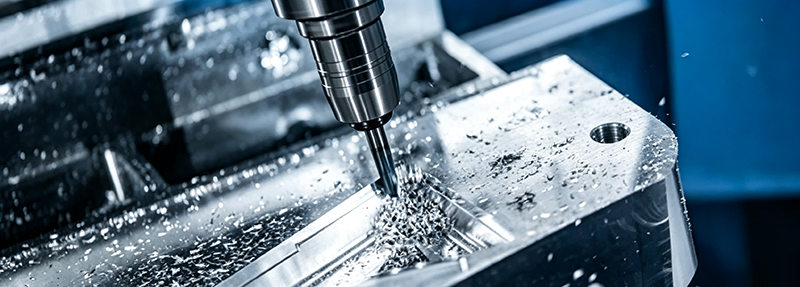
The finish is used across consumer electronics, appliances, automotive interiors, signage, architectural panels, and machined enclosures. On CNC machined parts, brushing is typically applied after machining and deburring, and it evens out tool marks on visible surfaces.
Ⅱ. How the Brushed Finish Is Made
Step-by-Step Process
A production brushing operation follows a fixed sequence. Skipping steps shows up directly in the final surface.
- Clean and inspect — oil, dust, or cutting fluid drags across the surface and creates stains and uneven lines.
- Remove defects, deburr, and break edges — deep scratches, burrs, and sharp edges interrupt the grain and catch the abrasive.
- Coarse grit pass — removes machining marks and establishes the grain.
- Medium/fine grit pass — refines line depth to the target texture.
- Non-woven pad pass — softens the lines and evens out gloss, same direction.
- Clean and protect — removes abrasive dust; applies anodizing, clear coat, or wax.
For CNC machined parts, deburring and edge breaking must happen before brushing. A burr or sharp corner tears the abrasive medium and leaves irregular marks that cannot be reworked without rebrushing the whole surface. And once a grain direction is set on the drawing, every pass and every rework must follow it — mid-part direction changes are the most common cause of rejection in cosmetic inspection.
Grit Selection and Brush Patterns
The abrasive grit determines how coarse the grain looks. Lower grit numbers cut deeper, wider lines; higher numbers produce a finer, softer texture.
| Grit Range | Result | Typical Use |
|---|---|---|
| 120–180 | Coarse, pronounced lines | Heavy texture, hiding deeper tool marks |
| 240–320 | Medium, balanced grain | Most cosmetic parts, general default |
| 400–600 | Fine, soft satin | Premium consumer product surfaces |
| Non-woven pad (e.g., Scotch-Brite) | Softens and homogenizes lines | Final refining pass over any grit |
Test the grit on a sample or scrap of the same alloy before committing a batch. Surface hardness and existing tool marks change how the same grit reads on 5052 versus 6061, for example.
When buyers say brushed aluminum they almost always mean straight grain — the abrasive moves in one direction, and it is the easiest pattern to control across batches. Other patterns exist — random (snowflake) for glare- and fingerprint-sensitive surfaces, spiral for cylindrical parts such as knobs and bezels, cross-hatch for decorative depth — but they require dedicated tooling and are more common on sheet products than on machined parts.
Manual vs Machine vs CNC Brushing
| Method | Best For | Trade-off |
|---|---|---|
| Manual | Small parts, prototypes, repairs, simple flats | Cheapest setup; consistency depends entirely on the operator |
| Machine (belt or wide-wheel) | Panels, sheets, high-volume flat parts | Consistent speed and pressure; still sensitive to tool wear and fixturing |
| CNC-controlled brushing | Complex parts, multi-surface parts, matched sets | Repeatable grain direction and overlap across batches; highest cost |
For a machined part with several visible faces that must match, CNC-controlled brushing with abrasive brushes or pads gives the most repeatable grain. For one flat cosmetic panel, a wide-belt machine pass is usually enough.
Ⅲ. Is Your Part Suitable for a Brushed Finish?
Not every aluminum part should be brushed. Suitability depends on geometry, appearance requirements, environment, volume, and the post-treatment plan.
| Dimension | Favorable for Brushing | Higher Risk |
|---|---|---|
| Geometry | Flat surfaces, regular curves, large radii | Deep pockets, narrow cavities, sharp internal corners, areas the abrasive cannot reach |
| Appearance requirement | Directional texture accepted; metal look wanted | Omnidirectional uniformity or zero grain deviation required |
| Environment | Indoor use, or protected by clear anodizing | Corrosive or high-wear environments without a protection plan |
| Scratch risk | Light same-direction wear acceptable | Frequent cross-direction abrasion in use |
| Volume | Stable batches; a reference sample can be established and reused | Very small lots with strict appearance consistency demands |
| Post-treatment | Clear or translucent finish that preserves the grain | Thick coatings that fully mask the texture |
| Acceptance | Grain direction, texture grade, and gloss can be checked against a sample | Only “brushed” on the drawing, with subjective “perfect match” expectations |
If the part has visible welds, deep machining marks, or handling dents, fix those first — brushing homogenizes minor surface variation, it does not remove structural surface defects.
Ⅳ. Best Aluminum Alloys for Brushing
The alloy determines how uniform the grain looks and how consistent the color holds across batches. For cosmetic parts, appearance behavior matters more than a datasheet strength margin.
| Alloy | Form | Brushing Behavior | Best Use |
|---|---|---|---|
| 3003 | Sheet | Fine, even grain; good corrosion behavior | Decorative panels, appliance trims |
| 5052 | Sheet/plate | Uniform texture, stable appearance | Cosmetic sheet metal panels and enclosures |
| 6061 | Bar/plate | Good overall; the CNC workhorse | Machined parts balancing strength, tolerance, and appearance |
| 6063 | Extrusion | Excellent surface quality, continuous grain | Extruded profiles, trims, frames with consistent linear texture |
| 7075 | Bar/plate | Brushes, but grain and color consistency vary more between batches | High-strength functional parts where appearance is secondary |
| 2024 | Bar/plate | Similar consistency risk to 7075 | Strength-driven applications; verify appearance on samples |
Practical selection: when the first priority is a stable, uniform appearance, start from 3003, 5052, or 6063. When the part is machined and needs strength plus appearance, 6061 is the balanced choice. For 7075 and 2024, the alloy choice should follow the functional requirement —and then confirm the brushed appearance on a sample rather than assuming a standard swatch transfers to production.
Ⅴ. Brushed Aluminum: Advantages and Limitations
| Advantages | Limitations |
|---|---|
| Uniform, low-glare metal texture that reads as a finished product | Grain is directional; parts brushed in different orientations will not match |
| Hides light scratches and fingerprints compared with polished surfaces | Cannot remove deep scratches, dents, or weld marks |
| Evens out light machining marks on visible CNC surfaces | Cross-direction scratches in use are conspicuous and hard to repair |
| Works with subsequent anodizing or clear coating for protection | Deep pockets and complex internal corners brush unevenly |
| Applicable to sheet, machined, and extruded parts | Strict grain-consistency requirements add inspection and rework cost |
The honest summary: brushing is a strong choice when the design wants a directional metal texture and the acceptance standard is defined. It becomes expensive when a project wants “perfectly uniform in every direction” — that is not what the process produces.
Ⅵ. Brushed Aluminum Cost: Breakdown and Reduction
What Drives the Cost
For a machined brushed part, brushing itself is usually not the dominant cost. The cost stack looks like this:
| Cost Element | Main Variables | Typical Share |
|---|---|---|
| Aluminum material | Alloy, form (bar vs sheet), quantity, utilization | Low to moderate |
| CNC machining / sheet metal forming | Complexity, tolerances, cycle time | Usually the largest share for machined parts |
| Brushing | Brushed area, part geometry, texture requirements, method | Low to moderate |
| Post-treatment | Anodizing type, color, coating thickness | Low to moderate |
| Inspection and packaging | Appearance standard, inspection level, scratch protection | Low, but rises sharply with strict appearance standards |
Indicative reference ranges at the sourcing stage — actual prices vary with region, supplier, order size, and part specifics:
| Item | Indicative Range | Notes |
|---|---|---|
| Aluminum stock | ~$3–10/kg | Alloy and form dependent |
| Mechanical brushing | ~$5–30/m² | Area, texture, method |
| Anodizing (clear/color) | ~$5–30+ per part | Type, color, film thickness, batch |
| Prototyping vs production | Small lots commonly run well above unit production price | Setup, samples, and fixed costs amortize poorly |
Two cost risks are specific to brushed parts. First, vague appearance standards generate rework cycles — each one re-runs brushing, cleaning, and possibly anodizing. Second, late texture changes (grit or direction changed after tooling) can invalidate an approved sample and reset the qualification loop.
How to Reduce Cost
- Brush only the surfaces that are visible in assembly; leave non-cosmetic surfaces machined or as-rolled.
- Specify grit, grain direction, and acceptance against a sample before quoting, so suppliers price a defined standard.
- Reduce deep pockets and sharp internal corners on cosmetic faces — they slow brushing and inspection.
- Match the post-treatment to the environment: bare indoor, clear anodized for handling and humidity, coated only when color or heavy protection is required.
- Keep material batch, brushing parameters, and the reference sample fixed across production runs to avoid requalification.
Ⅶ. Brushed vs Other Aluminum Finishes: Texture and Protection
Comparison charts often list brushed, polished, bead blasted, anodized, and powder coated side by side as if they were competing options. They are not. Brushing, polishing, and bead blasting are texture processes — you pick one. Anodizing and powder coating are protection layers applied on top of whichever texture you choose. Brushed and then anodized is a combination, not a competitor, so the real choice is two choices.
First, the texture:
| Texture | Look | Behavior |
|---|---|---|
| Brushed | Directional linear grain, low glare | Hides same-direction scratches; cross scratches visible |
| Polished | Mirror, high reflection | Shows every mark; highest maintenance |
| Bead blasted | Uniform matte, no direction | Hides minor marks well; industrial look |
Then, the protection layer:
| Protection | Effect on Appearance | Corrosion & Wear | Cost | Best For |
|---|---|---|---|---|
| Bare | Natural metal, unchanged | Native oxide only; fine indoors, shows wear with handling | Lowest | Indoor, low-contact parts |
| Clear or color anodized | Grain retained; slight tone and brightness shift | Hard anodic layer, typically 5–20 µm | Moderate | Consumer electronics, handled parts, humid environments |
| Paint or powder | Color freedom; thick films partially mask the grain | Highest barrier protection | Moderate to high | Outdoor, corrosive environments, brand colors |
Anodizing after brushing preserves the grain but measurably changes tone and gloss — and the shift differs by alloy. The approval sample must therefore run the full process, brushing plus anodizing, not brushing alone.
Ⅷ. How to Specify Brushed Finish on Drawings
“Brushed finish” alone on a drawing is not a specification. Different suppliers will interpret it differently, and first articles will not match production. Define at least these items:
| Item | What to Specify | Example |
|---|---|---|
| Area | Which surfaces are brushed | All external visible surfaces |
| Grain direction | Direction relative to part features | Parallel to long edge, or as indicated by arrows |
| Grit / texture grade | Abrasive grit or texture class | 320 grit |
| Surface effect | Target appearance | Uniform linear grain, satin |
| Post-treatment | Anodizing or coating, if any | Clear anodize after brushing |
| Acceptance | Inspection condition and reference sample | Visual inspection under standard lighting against approved sample |
An example callout block:
BRUSHED FINISH, 320 GRIT, GRAIN DIRECTION AS SHOWN. CLEAR ANODIZE AFTER BRUSHING. APPEARANCE PER APPROVED SAMPLE.
For directional grain, add arrows on the affected faces rather than describing the direction in words. For strict appearance requirements, attach a Golden Sample (the approved standard) and, where useful, a Limit Sample (the worst acceptable condition) and reference them in the drawing or PO as the acceptance basis.
Ⅸ. Sampling and Quality Inspection
Appearance consistency cannot be controlled by text alone. The workable sequence is sample approval → standard establishment → production acceptance.
At sampling, confirm against parts produced with the intended production process — same alloy batch, same grit, same anodizing — not against a generic swatch. Check grain direction including transitions across multiple faces, line depth uniformity, color and gloss, and the post-treatment result.
| Inspection Item | What to Check |
|---|---|
| Grain direction | Matches drawing or sample, including multi-face parts |
| Texture consistency | Line depth and density uniform across the part |
| Color and gloss | Consistent within batch and across batches |
| Surface defects | No visible scratches, dents, press marks, or spots beyond the limit sample |
| Edges and corners | No grain interruption or irregular patches at transitions |
| Post-treatment quality | Anodizing/coating free of color shift, bubbling, or adhesion failures |
For acceptance language, avoid subjective terms like “good appearance.” A workable standard reads, for example: “Visual inspection at normal viewing distance under standard lighting. No scratches, dents, color variation, or grain non-uniformity visible beyond the limit sample on designated cosmetic surfaces.” Define which surfaces are cosmetic and which are not, and let the samples arbitrate disagreements.
Ⅹ. Pre-Quote Checklist
The more of this information is available at quoting, the tighter the quotes and the fewer surprises at first article.
| Item | Confirm Before Requesting a Quote |
|---|---|
| Drawings | Latest 2D/3D revision, key dimensions and tolerances identified |
| Alloy and form | e.g., 5052 sheet, 6061-T6 bar |
| Brushed area | Which surfaces; which are excluded |
| Grain direction | Arrows on the drawing |
| Texture | Grit or texture grade, or reference sample |
| Post-treatment | Bare, anodized (type, color), or coated (system, color) |
| Appearance standard & samples | Cosmetic vs non-cosmetic surfaces, acceptance criteria, reference samples (first article, Golden, or limit) |
| Packaging | Protective film, individual separation, scratch protection |
Conclusion
Brushed aluminum is the right call when a part needs a directional, low-glare metal texture — and the specification, alloy, and acceptance standard are defined up front. The failures that show up in production are rarely about the brushing itself: they come from undefined grain direction, unqualified alloys chosen for strength alone, post-treatment shifts discovered after approval, and acceptance standards that exist only as adjectives.
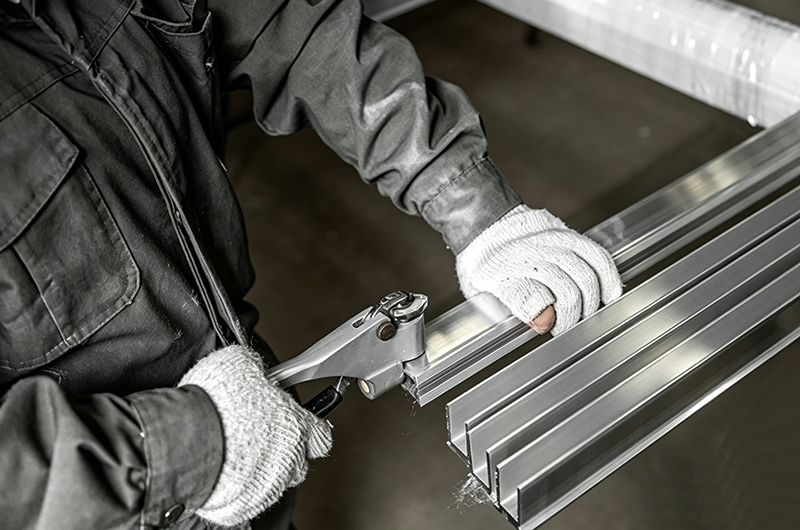
If you are evaluating brushed aluminum for a current part, Keywin machines and finishes aluminum parts in-house — CNC machining and sheet metal fabrication followed by brushing, anodizing, bead blasting, and powder coating under one quality system. Upload your drawing for a DFM review and an instant quote, and the finish requirements can be confirmed against a sample before production.
FAQ
1. Type II clear or Type III hardcoat anodizing — which preserves brushed grain better?
Type II clear anodizing (typically 5–20 µm) preserves the grain, with a slight tone and gloss shift that differs by alloy. Type III hardcoat builds a much thicker, denser layer (25 µm and up) that is harder and more wear-resistant — but the thick film frosts the surface and dulls the grain lines, and fine textures such as 400–600 grit can partially disappear under it. The rule of thumb: Type II for cosmetic brushed surfaces, Type III when wear resistance outweighs texture fidelity. In both cases the approval sample must run the full process, brushing plus anodizing.
2. What surface roughness (Ra) does a brushed finish correspond to, and should it be on the drawing?
A brushed surface typically measures Ra 0.3–1.0 µm, depending on grit, alloy hardness, and the final non-woven pass. For a cosmetic brushed finish, however, Ra is the wrong acceptance instrument: a profilometer quantifies average roughness, not grain direction, line density, or gloss — the attributes appearance inspection actually judges. Specify the grit and texture grade on the drawing, and reserve Ra callouts for machined sealing or bearing surfaces where average roughness is the functional requirement.
3. Can brushing be applied to only certain areas of a part?
Yes, masking or selective brushing limits the grain to designated surfaces. It works best when the boundary between brushed and unbrushed areas falls on an edge or a natural feature. Define the boundary on the drawing — mid-surface transitions are hard to keep sharp.
4. How do you repair a scratched brushed surface?
Light same-direction scratches can often be reworked by rebrushing the affected area in the grain direction with the original grit, then refinishing. Cross-grain scratches usually require rebrushing the entire surface for a uniform appearance, and re-anodizing if the part was anodized. Prevention through packaging and handling is far cheaper than repair.
5. Why do supplier quotes for the same brushed part differ so much?
Quotes differ in what they assume and what they include: brushing method (manual, machine, CNC-controlled), whether a sample loop is priced in, anodizing type and film thickness, inspection level against an appearance standard, and packaging. A quote without a defined texture and acceptance standard is not comparable — specify grit, direction, post-treatment, and sample basis before comparing prices.
6. How long does a bare brushed finish last indoors and outdoors?
Indoors, bare brushed aluminum holds its appearance for years in low-contact use; handling gradually polishes highlight areas and fingerprints etch the surface over time. Outdoors, bare brushed aluminum weathers: oxidation dulls the surface and produces uneven staining, especially in coastal or industrial environments. For outdoor parts, specify anodizing or coating.